How to Enable or Disable Data Execution Prevention
Use the CMD or Control Panel to enable data execution prevention
- Data Execution Prevention (DEP) is a security feature on Windows from XP Service Pack 2 to Windows 11.
- The tool protects your computer from malicious executable code by dividing your system memory into two.
- DEP can be disabled or enabled via the Command Prompt, Control Panel, and Windows Settings.
The Windows OS is user-friendly, though it comprises various features for advanced and professional users. The Data Execution Prevention (DEP) feature in Windows versions from XP Service Pack 2 to Windows 11 is one of them.
However, different people have been concerned about knowing what the data execution prevention feature is and whether to turn it on or off. Therefore, we will discuss DEP and how to enable or disable Data Execution Prevention on Windows PCs.
What is data execution prevention?
Data Execution Prevention (DEP) is a built-in security feature in Windows designed to protect your PC against malicious code execution. It divides your computer memory into two categories: executable and non-executable. Therefore, restricting specific memory areas from being executed as code.
How we test, review and rate?
We have worked for the past 6 months on building a new review system on how we produce content. Using it, we have subsequently redone most of our articles to provide actual hands-on expertise on the guides we made.
For more details you can read how we test, review, and rate at WindowsReport.
The key features of DEP are:
- Preventing malicious code execution
- Restricts specific memory parts from being executed as code
- Safeguard against buffer overflow and likely attacks
- Protects against various types of malware and exploits
- Enhances system security
- It allows you to configure individual applications or the entire system.
Having discussed DEP and its key features, we will walk you through explicit steps to turn it on or off.
How do I enable data execution prevention?
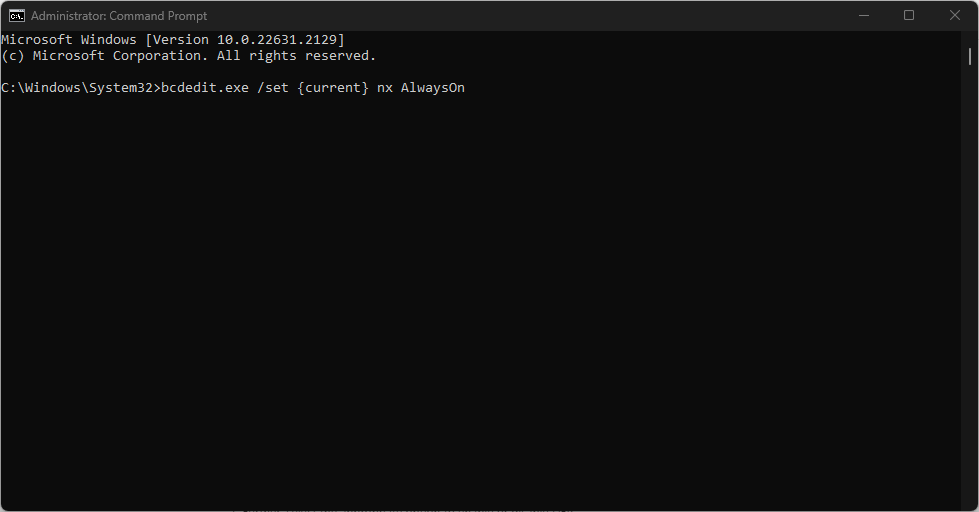
1. Use Command Prompt
- Left-click the Windows icon, type CMD, and click Run as administrator.
- Then, select the Yes button if the UAC permission prompts.
- Copy and paste the following command and press Enter to enable DEP:
bcdedit.exe /set {current} nx AlwaysOn
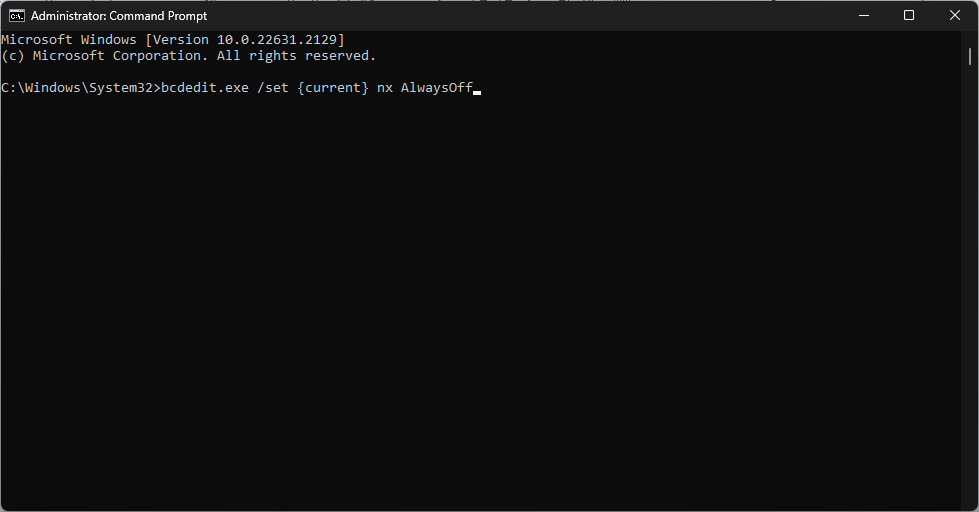
- Also, to disable Data Execution Prevention, type this and press Enter:
bcdedit.exe /set {current} nx AlwaysOff - To check if DEP is enabled
Check our detailed guide on how CMD is not working in Windows 11.
2. Via Windows Settings
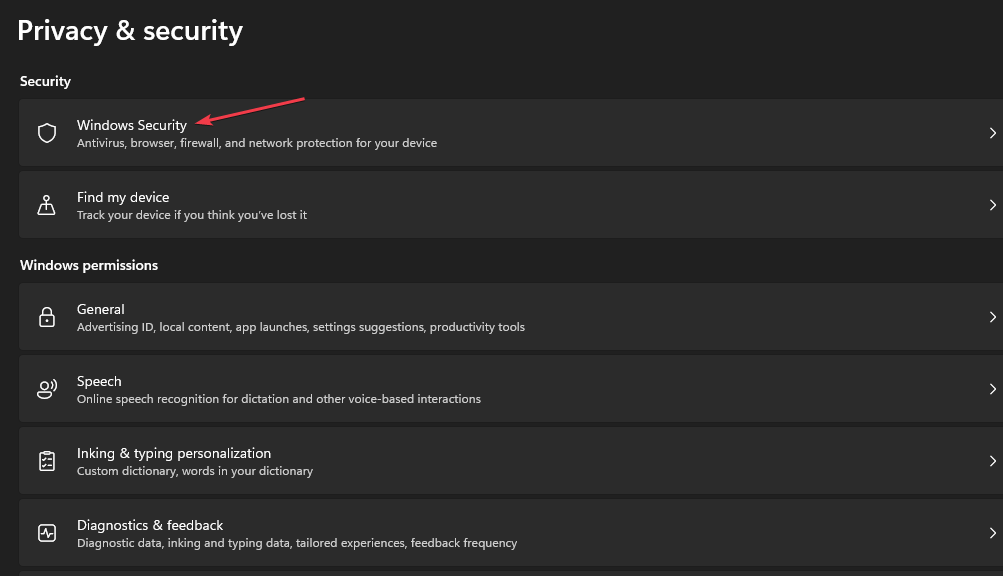
- Left-click the Windows icon and select Settings.
- Select the Privacy & Security category and click on Windows Security.

- Select the App & Browser control category. Navigate to the Exploit Protection section and click the Exploit Protection Settings link.

- Then, go to Data Execution Prevention (DEP) and click the drop-down arrow.

- Further, select the appropriate option to enable or disable DEP.

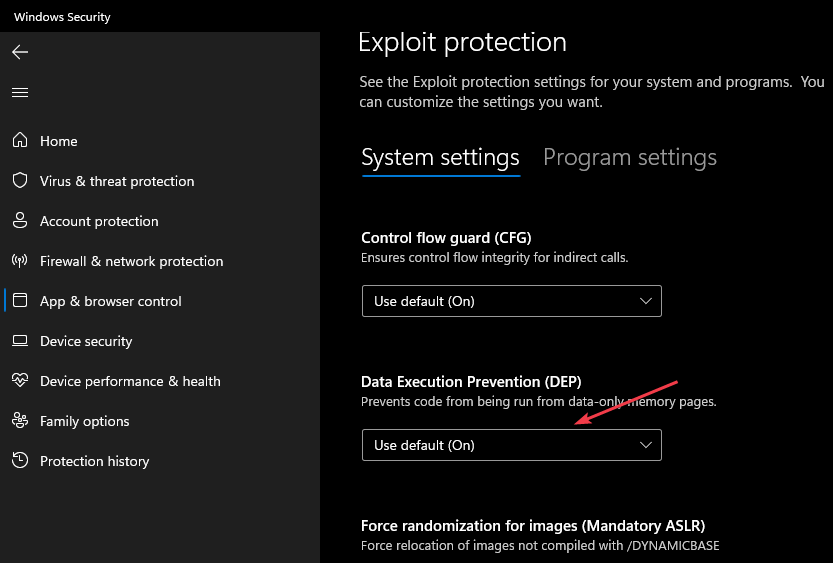
Note that the Data Execution Prevention will to DEP Default (ON) on your PC. You can read our complete guide about ways to fix Windows Settings not opening on your computer.
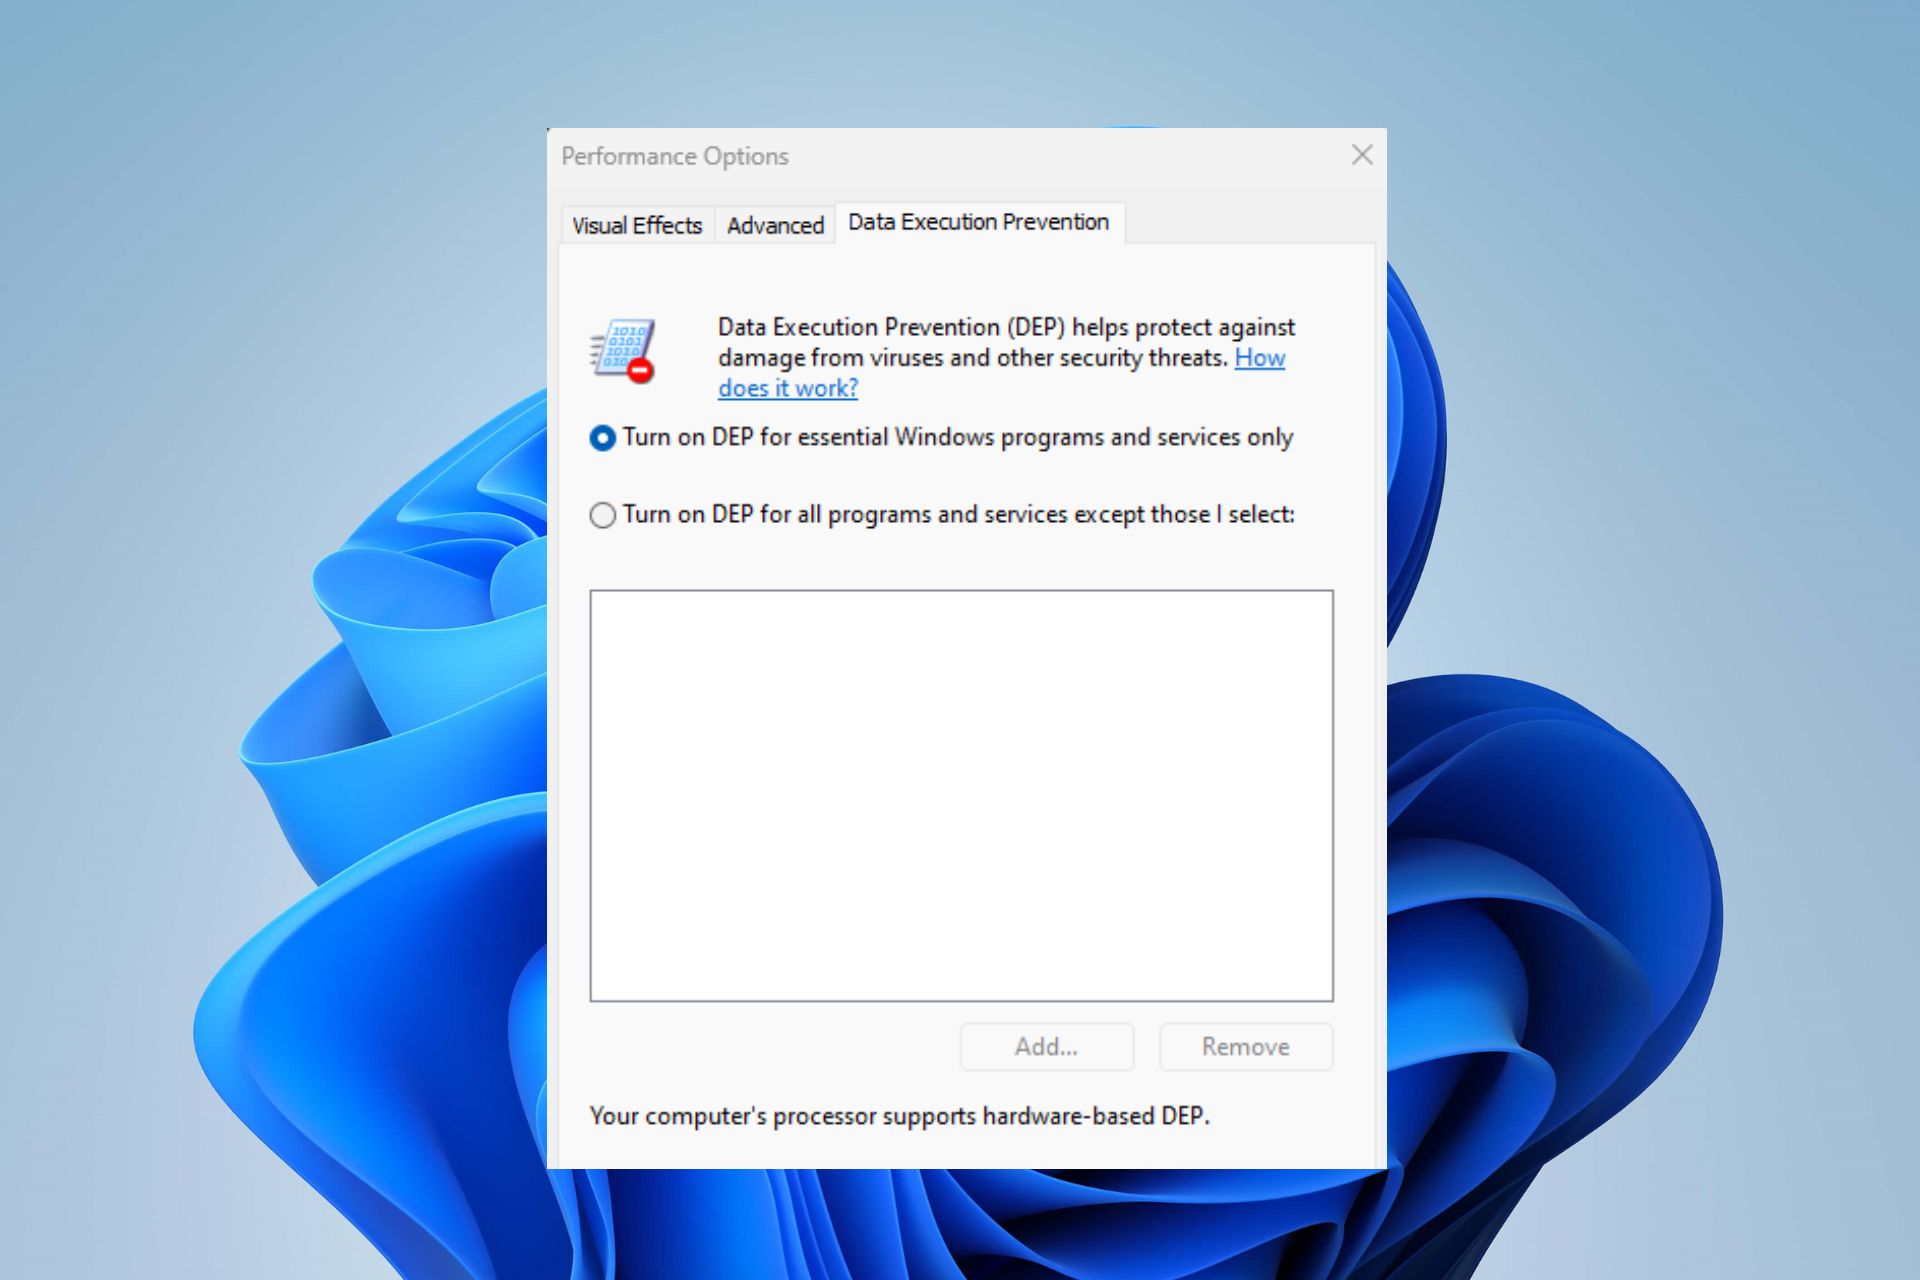
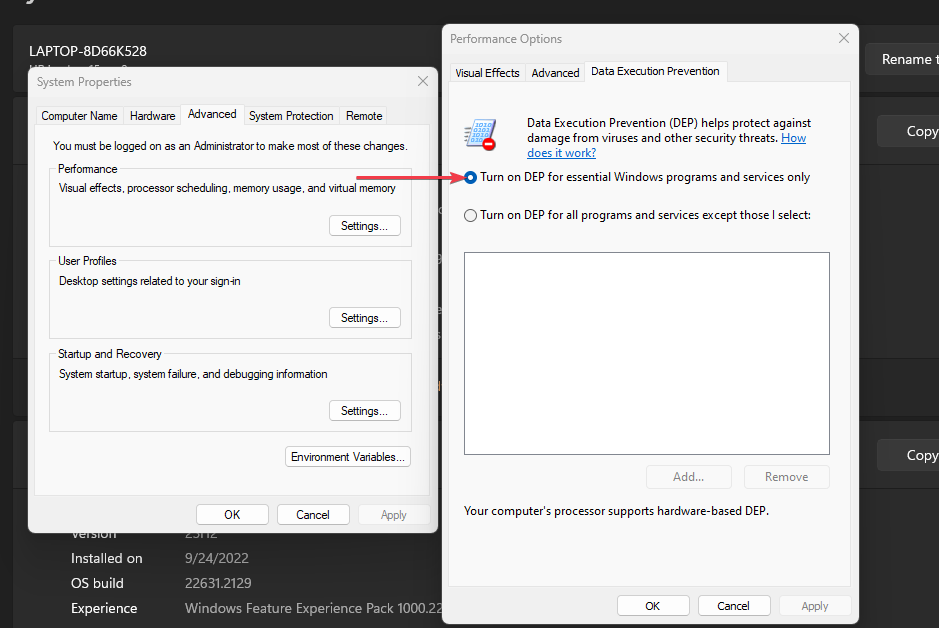
3. Use the Control Panel
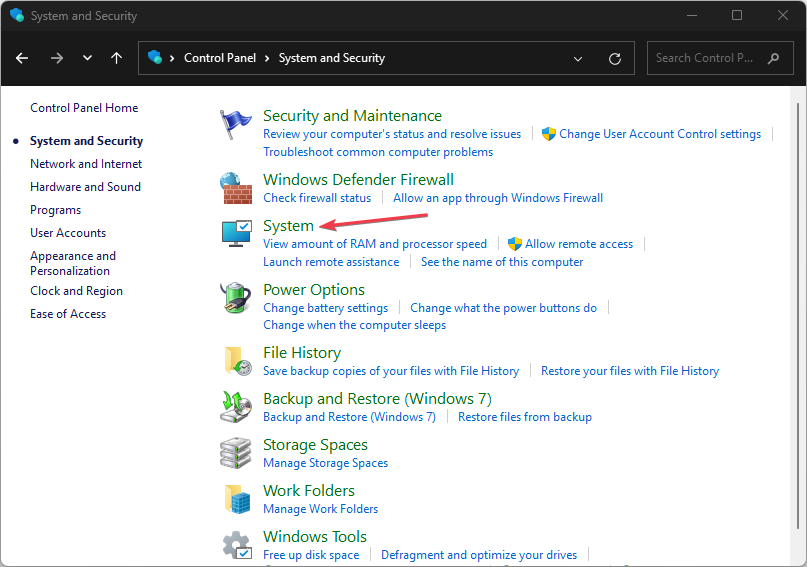
- Press the Windows button, type Control Panel, and press Enter.
- Select the System and Security category, and click on System.

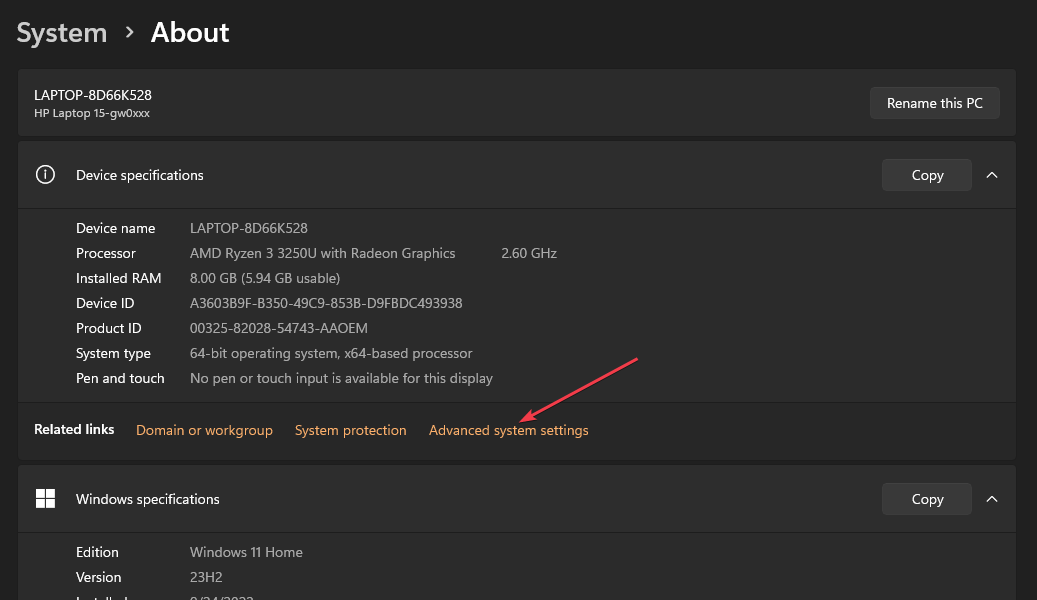
- Select the Advanced System Settings link from the right pane of the new window.

- Navigate to the Performance section and click the Settings button.

- Select the Data Execution Prevention tab from the top and click the Turn on DEP for essential Windows programs and services only radio button.

- Then, click the OK button and restart your PC.
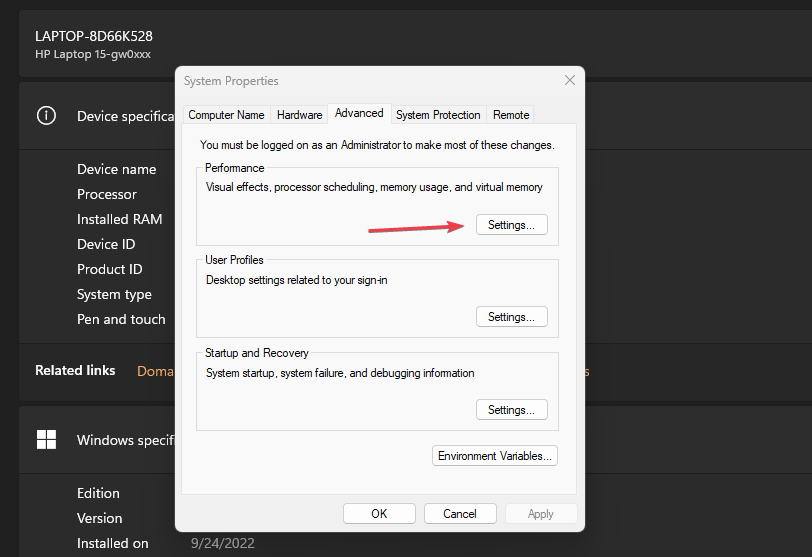
The above steps allow you to turn on and off the Data Execution Prevention feature.
We have a detailed guide on what Control Panel is and how to use it on your computer. You may also check out our article on resolving Standard Hardware Security not supported on Windows 11.
Should you have further questions or suggestions, kindly drop them in the comments section.